
How to Create Custom Category Tags
The methods below allow you to add items to categories that don’t exist on the site (product tags), or allow you to add products to multiple categories (secondary categories)
Important Note for Edge Users:
It is best to manage your item tags within the EDGE website tab. This ensures that any tags added on the website are not wiped out the next time you do a full inventory upload.
Item Tags
The main use of a product tag is to utilize it as a data source for product widgets OR to create a custom category.
Note: Depending on your POS software, your Punchmark website may give you the convenience of controlling item tags from your POS, skipping the steps below. See the SiteManager > Settings > POS Settings page, and look for “Item Tags”.
Creating Item Tags
Go to Site Manager > Commerce > Jewelry
Edit a product you want to add to your custom category
In the “Categorization” section, enter the name of the tag in the “product tag” textbox
Please Note: product tags cannot have spaces or special characters. If your tag has more than one word, please enter them with no spaces
Also Note: you can add more than one tag per product
Be sure to select “save”!

Adding Item Tags
Go to SiteManager > Commerce > Batch Processor
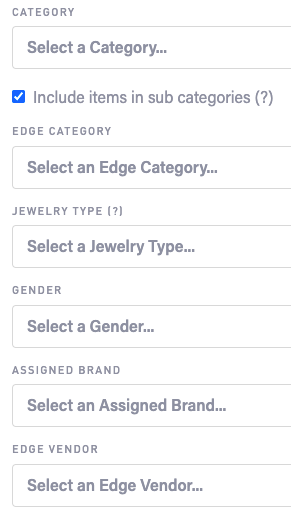
Select your subset of products that you want to add your tag to. Most retailers will use the Edge category option to combine Edge categories, but it depends on your specific needs
Please Note: If you are only tagging a few products, you may want to use the Manage Jewelry page (Commerce > Jewelry) to add your tags as explained above.
Select “find and continue”
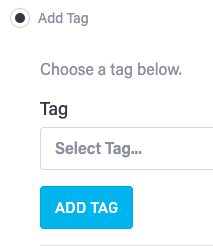
Select the “add tag” radio button option and select the tag you are adding to those products in the dropdown. Then click “add tag”.
Continue this process until you have tagged all of the products you want added to your custom category.
Your custom category’s URL will be yourwebsite.com?itemtag=tagname. If you’d like this URL added to your navigation, please send this link to your account manager by submitting a ticket (SiteManager > Home > Tickets) or emailing customerservice@punchmark.com.
Secondary Categories
The main use of secondary categories is to be able to add products to more than one category.
Creating Secondary Categories
Go to SiteManager > Commerce > Categories
Click “add root category” to add the category to your website if it is not one already. You can also add the category as a subcategory if that makes sense for what you are trying to accomplish
Example: If you have products in your “fashion rings” category that you think will be great as a gift and you already have a gift category, but you’d like to create a subcategory of gifts called “staff picks 2021” to add some fashion rings to. You’ll want to create that subcategory of gifts here
Adding Products to Secondary Categories
Go to SiteManager > Commerce > Batch Processor
Select your subset of products that you want to products as a secondary category to. Most retailers will use the Edge Category option or Edge Vendor option, but it depends on your specific needs
Please Note: If you are only adding a few products to a secondary category, you may want to use the Manage Jewelry page (Commerce > Jewelry) to add your items as shown in the screenshot below

Click “find and continue”
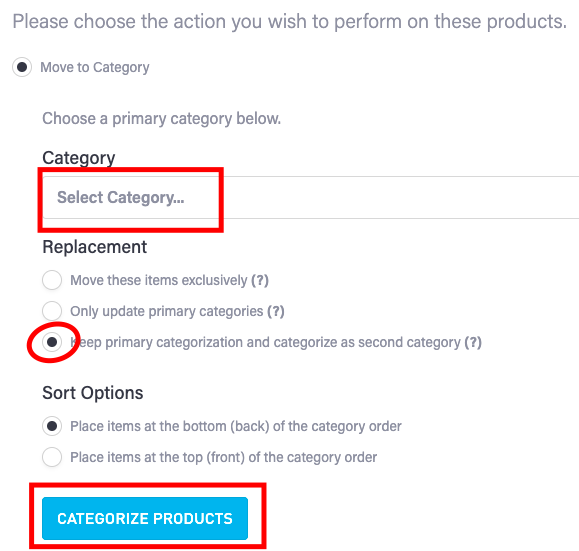
Select the “move to category” radio button and select the secondary category that you want to add to those products to in the dropdown.
Be sure to select “keep primary categorization and categorize as secondary category” and click “categorize products”.
Continue this process until you have finished adding the products to their respective secondary categories.