
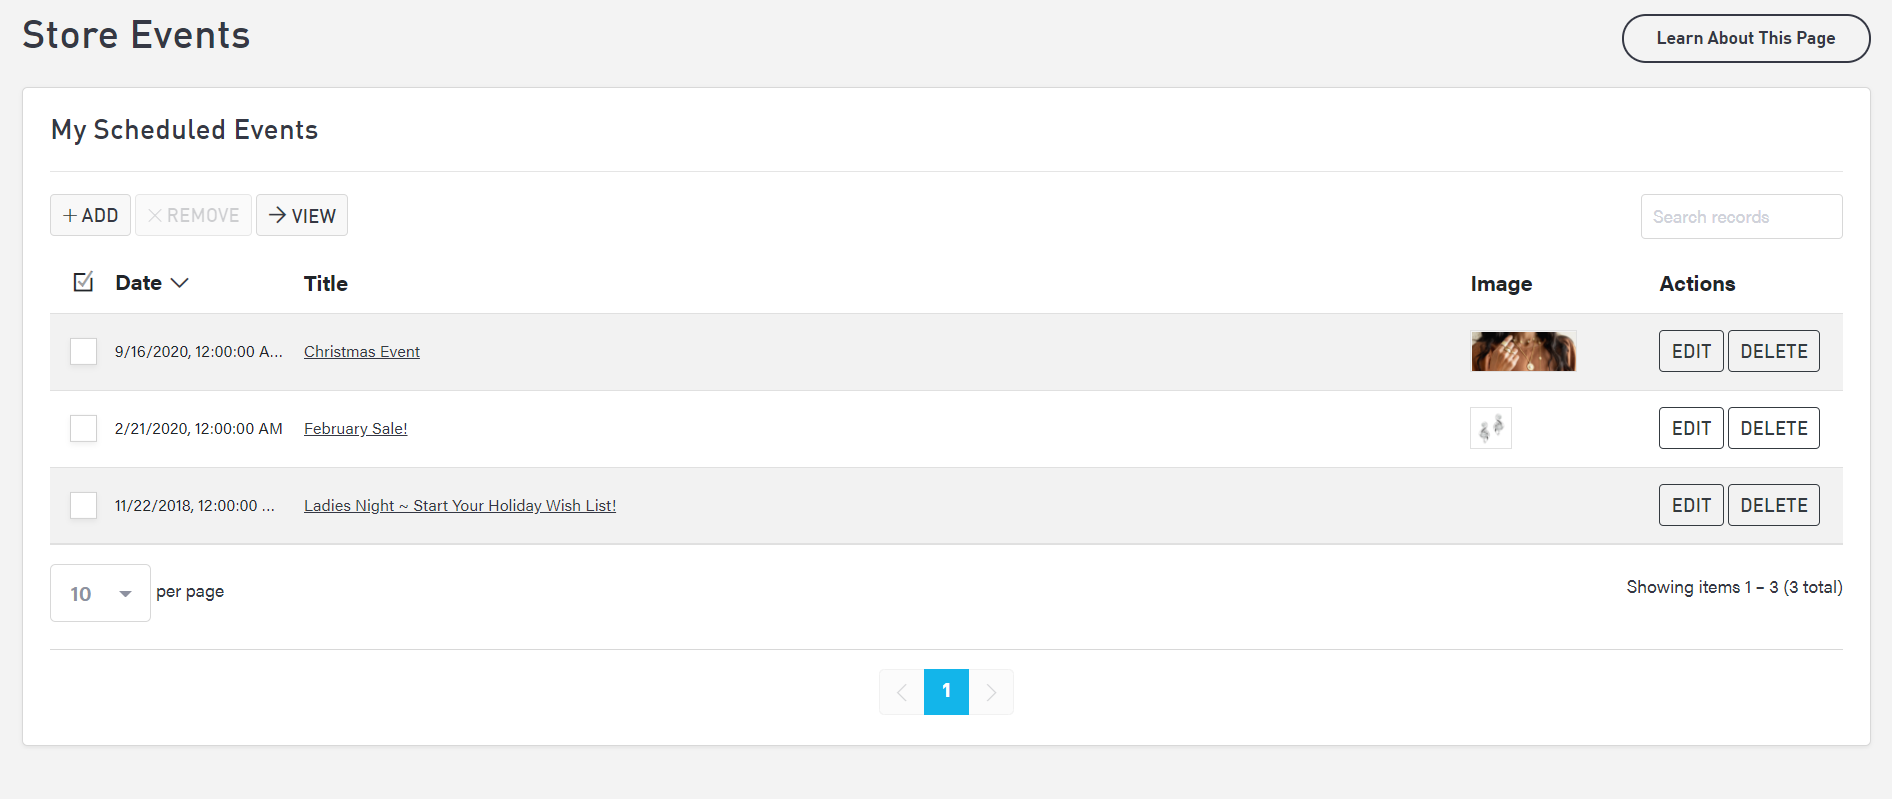
Store Events
The Store Events page allows you to put events on your website with discrete timeframes, special images, and event information. To access the Store Event editor, in the main menu, select Content > Store Events. You will see a block titled “My Scheduled Events.”
Adding a New Event
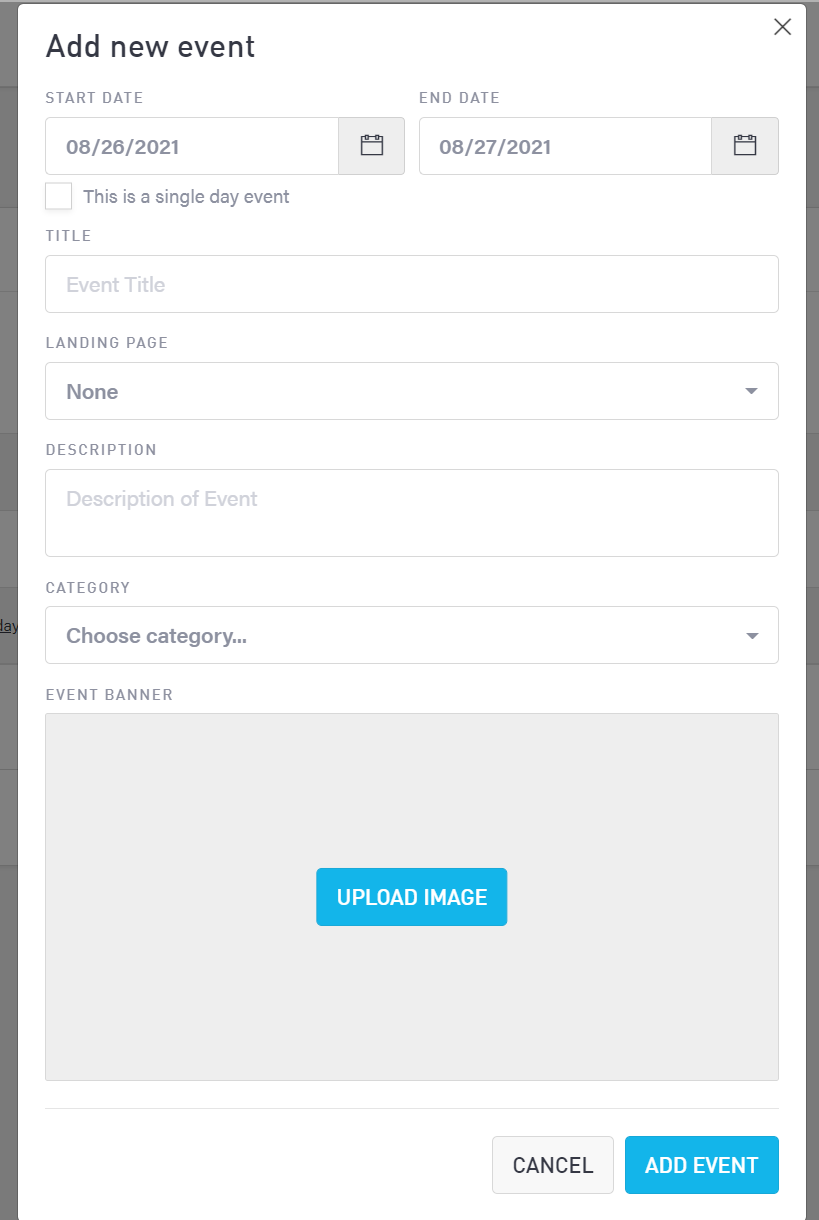
To add a new event, select the “Add” button in the left-hand corner of the page. A pop-up will appear prompting you to add your event information.
Choose Event Dates
Enter the start and end date using the date selectors. You can also choose to create a single-day event, which will only have a start date.
Your date range is inclusive of your end date. In the screenshot below, the event would run for both August 26 and 27, making this a two-day event.
Add Event Details
Enter your title, the link to the event landing page, and an event description. You can put as much or as little detail in your description as desired. This is also a useful place to practice good SEO.
Currently, you cannot set times for your events. Please list any event times within the description and/or on the event landing page.
Select an Event Landing Page
If you event has a separate page with more details, you can link your event to the landing page using the dropdown. If you do not have a separate landing page, choose “None.” A landing page is helpful to provide more information about your event and provide an easy page to link to on social media, blogs, and newsletters but is not necessary.
Choose an Event Category
Optionally, select the event category using the dropdown. If you do not have categories, you can add new ones by selecting “New Category” and filling in the box that will appear underneath the Category dropdown. While you can make your categories as specific or general as you’d like, we recommend sticking to broader category titles. Some good examples are “Holiday Specials” and “In-Store Events.” If you host recurring events such as monthly Ladies' nights or sip-and-shops, you might choose to make those a separate category, or you can place them more generally under “In-Store Events.”
Add an Event Banner
Lastly, choose an event banner that best represents your event by selecting “Upload Image.” Please note that your computer’s File Browser will open (unlike many applications where FileManager will open). The image can be any dimensions but it will appear as a thumbnail, so it is best to not include words or detailed imagery. While optional, an image will make your events stand out easier.
Publish Your Event
To save your event, select “Add Event” at the bottom of the pop-up.
Editing an Existing Event
To make changes to an existing event, select the “Edit” button under Actions to the right of the event you wish to update. Make any necessary changes, and then select “Save Event” to keep your changes.

Removing an Event
To remove a single event, select “Delete” in the Actions column to the right of the event you wish to remove. To remove multiple events, use the checkboxes to the left of the events and then select “Remove” at the top of the page.
Once an event is past its end date, it will not appear on your events page. If you have recurring events, there is no need to delete them. You can simply edit the existing events as if they were templates by updating the dates and any other relevant information.
Viewing Your Events Page
To see what your Event page looks like, choose “View” in the left-hand corner. A new tab will open to your events page. Your events page comes as a standard part of your v6 site; there is no need to build it separately before adding events.
If you have a landing page linked, you will see a button titled “Event Details.” If no landing page is linked, the button will not appear.
