
Adding New Edge Categories
Punchmark's step-by-step guide for adding new Edge categories to your website.
Steps to Add a New Category:
1. After adding new Edge categories in Edge, log into your website’s SiteManager and go to Point of Sale > POS Category Mapping and ensure that your Edge category number is showing in the leftmost column
a. If your new Edge category ID is NOT displaying on this page, this means Punchmark has NOT received it and you’ll want to reach out to Edge’s support team (support@ajsllc.com) for assistance in getting that Edge category to us.

2. On that same Category Mapping page, in the column labeled “Web Category”, you’ll need to select the website category that you want associated with that Edge category.

a. If one does not exist yet, go to SiteManager > Commerce > Product Categories and create the website category here. Once created, go back to Step 2
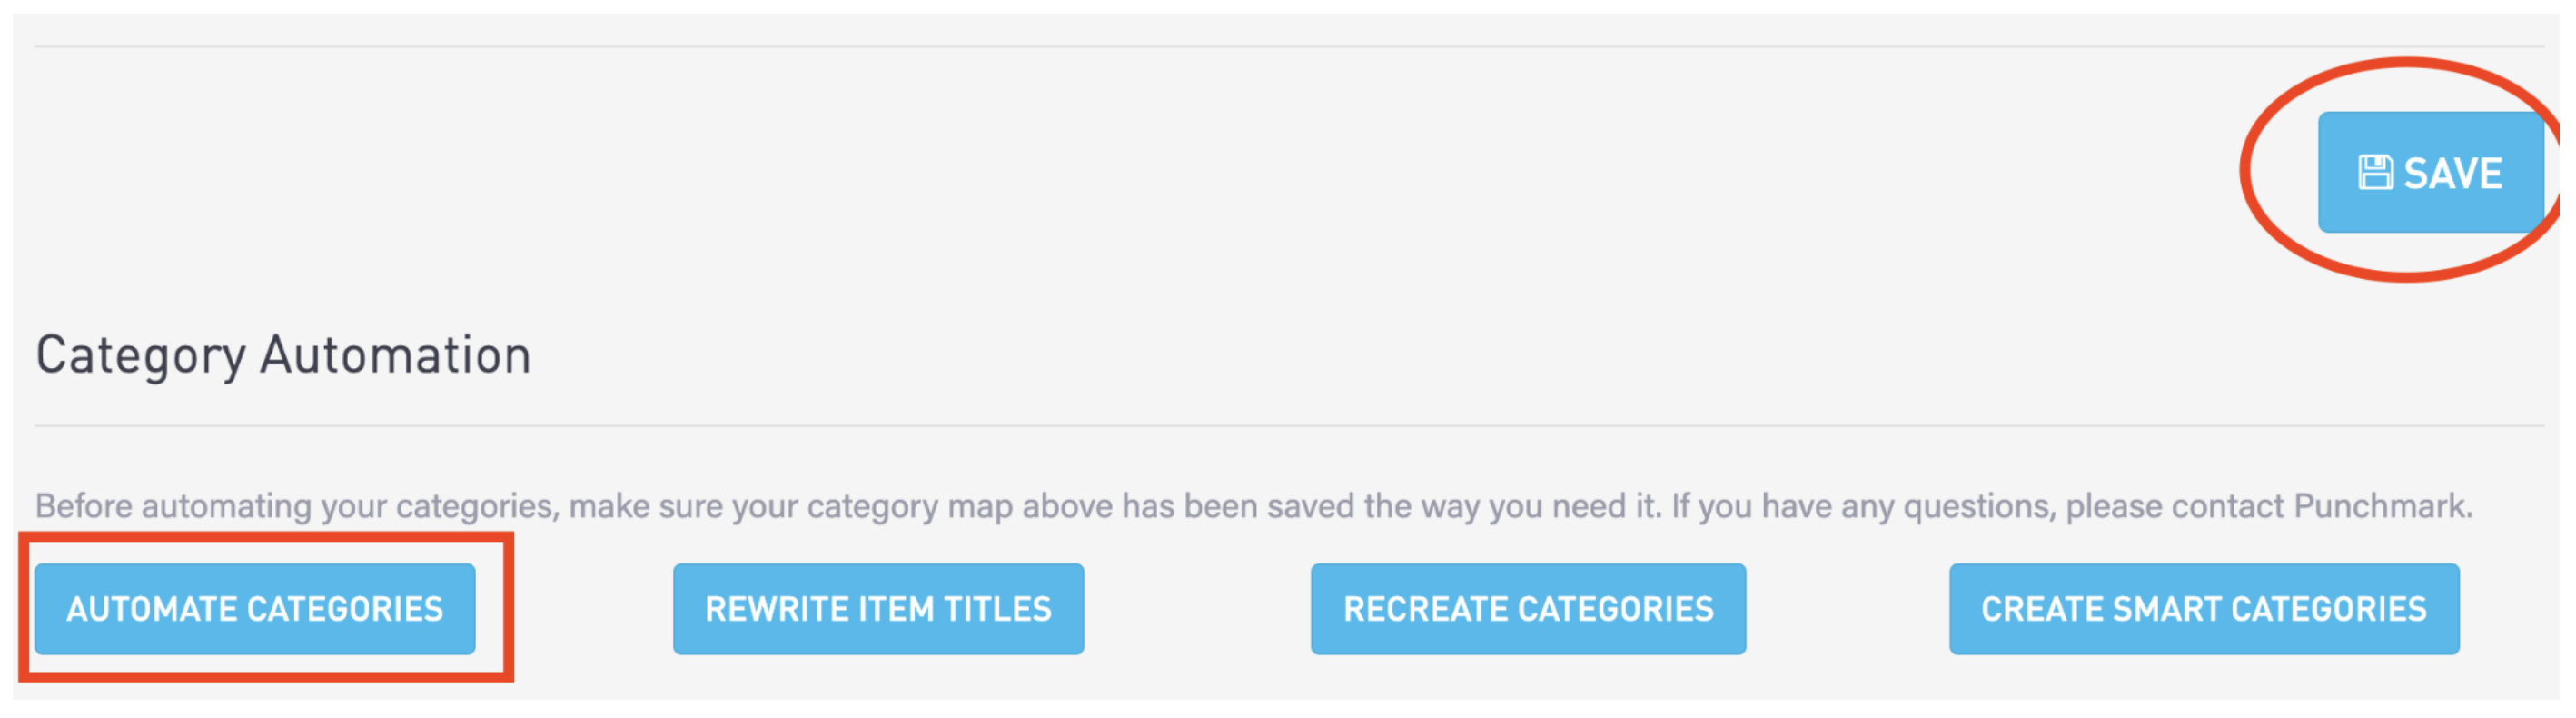
3. Now that you’ve selected the Web Category that you want your new Edge category to display in, be sure to click “Save” on the bottom right AND “Automate Categories” to move those new products to that website category.
That’s it! If you have any issues with any of the above steps, please feel free to reach out to your account manager by making a ticket in SiteManager > Home > Tickets.